I have a Blog now

  • The View Dress | Free Crochet Pattern | Series Hub

    The View Dress is a bold, made-to-measure crochet piece with a dramatic cowl neckline at the back and a silhouette that’s shaped to your body. It’s designed to be flexible, use any yarn weight and compatible hook, and let the fabric reflect your style. Whether you want something breezy and drapey or structured and cozy, this pattern adapts to you.

    I stitched mine in black bamboo yarn with a 2.5 mm hook, from Colombia to Brazil, and documented every step. The result? A five-part blog series that walks you through the entire process, from swatching and shaping to straps, neckline, and final tweaks.
    This pattern is free, customizable, and designed to travel with you, whether that’s across a continent or just to your favorite chair.

    Materials & Sizing

    • Yarn: Black bamboo, fingering weight (I used around 8 balls of yarn for a size XS)
    • Hook: 2.5 mm
    • Sizing: Custom-fit based on your own measurements
    • Notions: Stitch markers, elastic thread, hooks & eyes

    If you’re crazy like me use the same yarn as me. But you can absolutely choose any yarn weight and compatible hook. This is a made to measure pattern, so it adapts to your body and your style.

    The 5-Part Series

    1. Part 1: The Start of The View Dress
    Written from a plane over the Amazon. I introduce the project, the yarn, and the plan to crochet a dress while traveling. Includes swatching, early design thoughts, and why I refused to quit this time.

    2. Part 2: Skirt’s Front Panel
    From Bogotá to Cartagena, I explain how to shape the front skirt panel with custom measurements and stitch math. Includes tips on gauge, increases, and how to calculate your own fit.

    3. Part 3: Skirt’s Back Panel
    Written from Nazca, Peru. This post covers dart placement and shaping for the back panel, with extra increases to fit your curves. Plus: row-tracking tips and travel updates.

    4. Part 4: The Top Portion
    From bust shaping to strap construction, I walk through the top half of the dress. Includes neckline finishing, closure ideas, and a few stories from the Andes and beyond.

    5. Part 5: Mistakes I Made and How to Fix Them
    Final tweaks for fit and silhouette, because frogging was not an option. Learn how I adjusted the cowl neckline and side flare with elastic thread. Plus: blocking tips and final thoughts on the finished piece.

    Share Your View

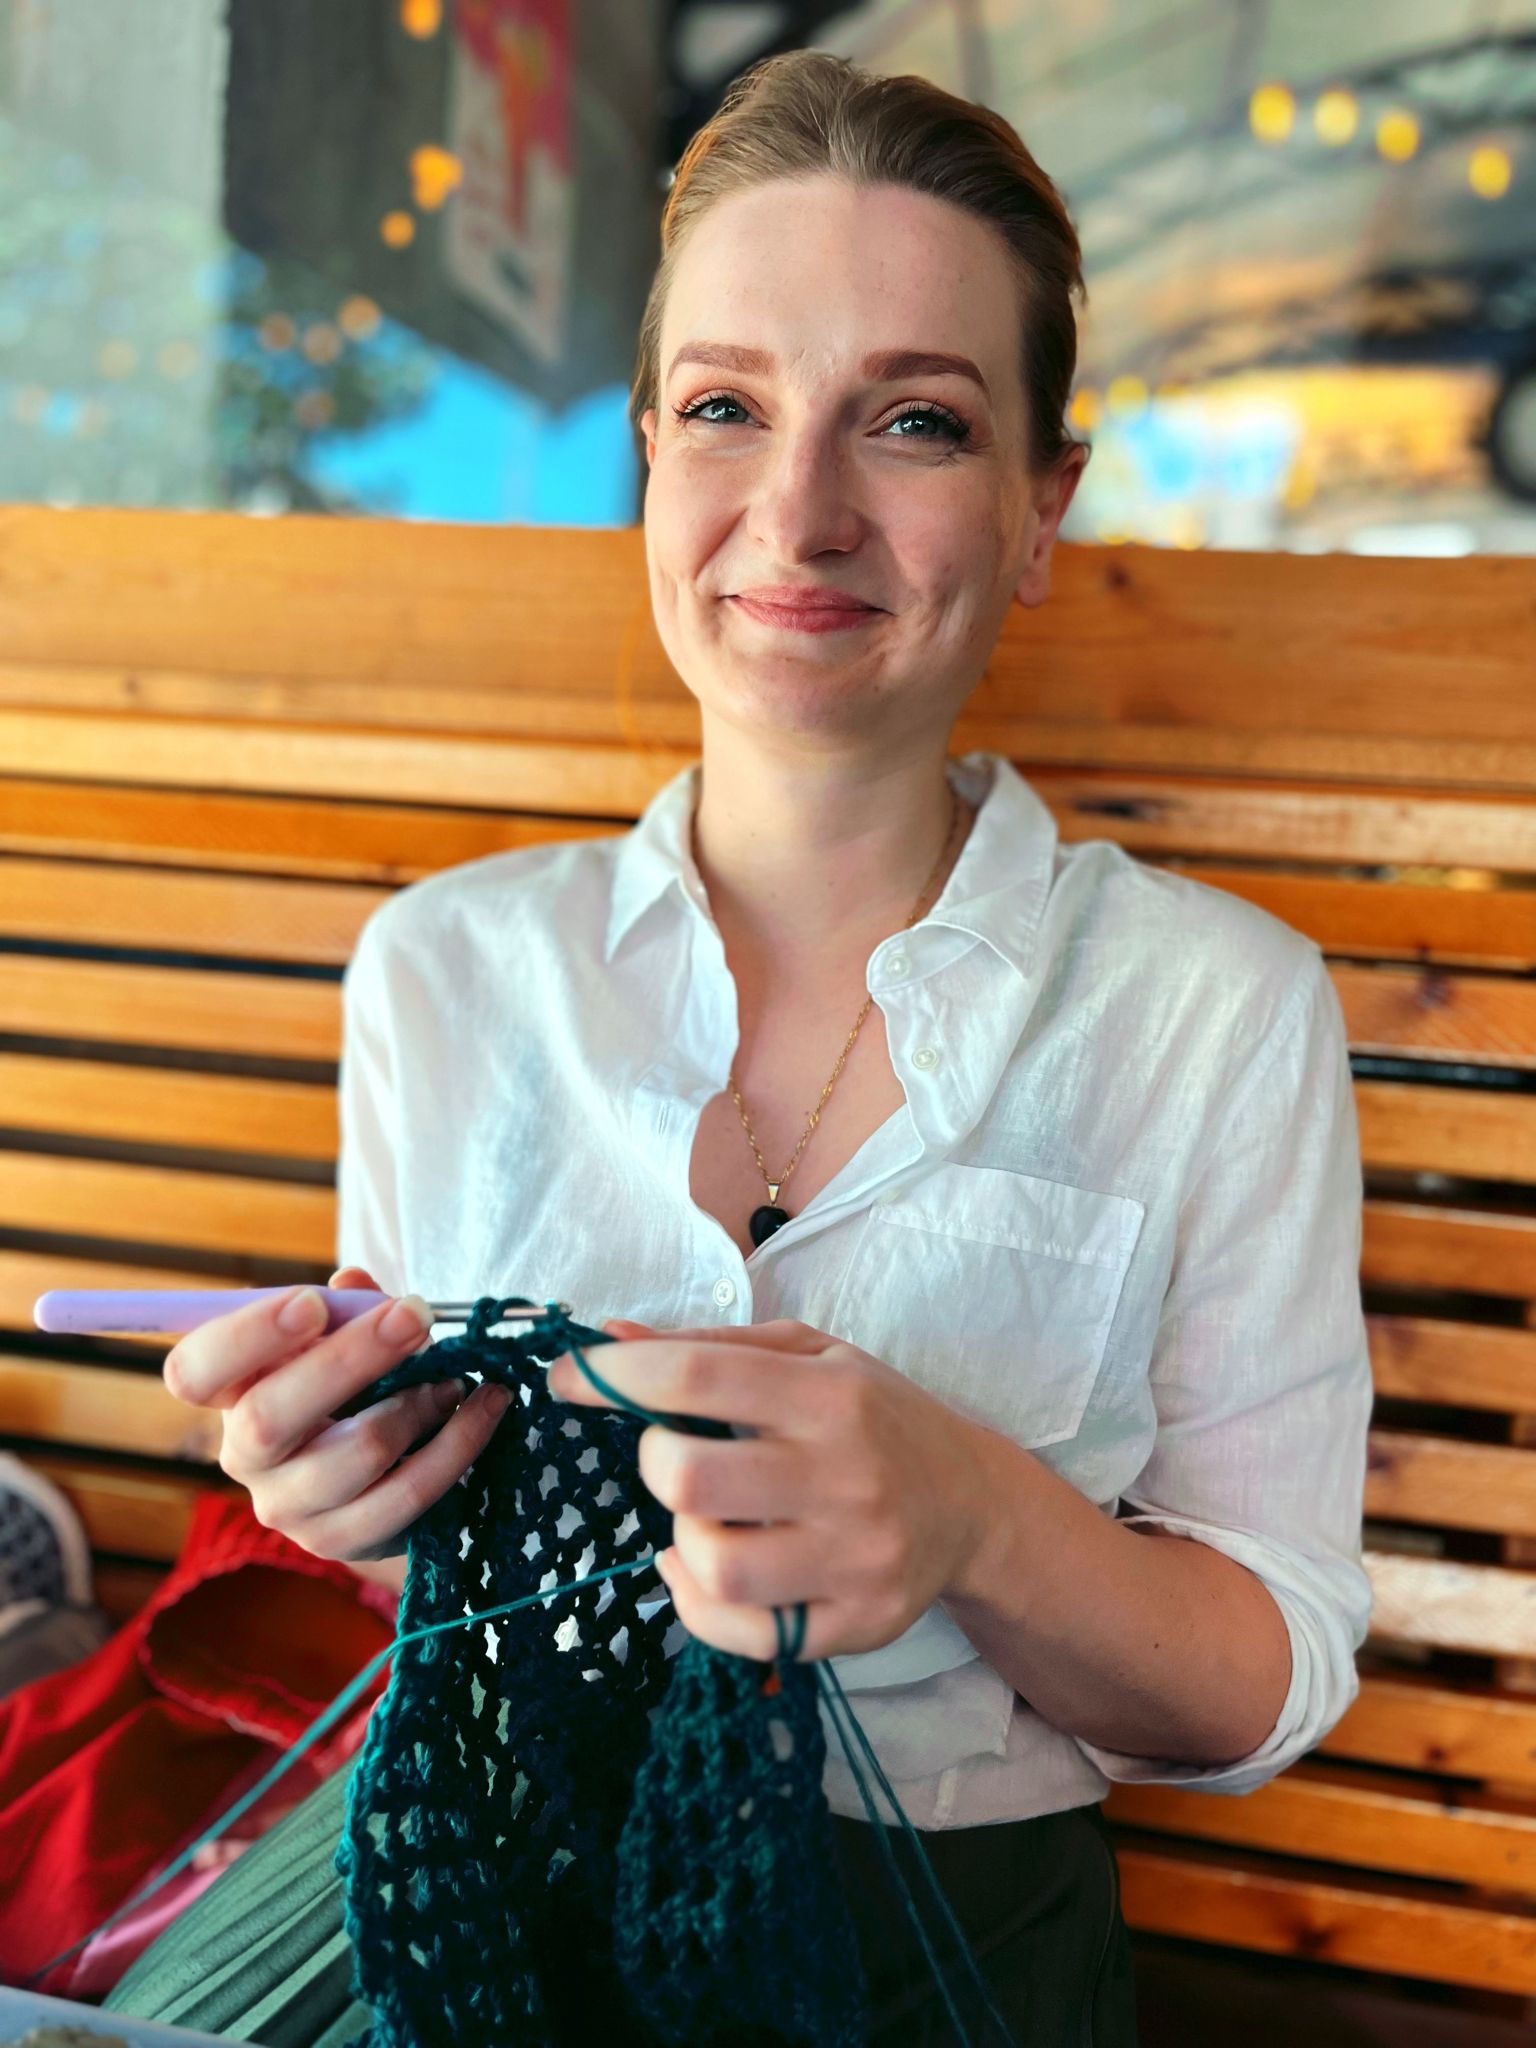
    Whether you’re crocheting on a mountaintop, a city balcony, or your favorite cafe, I’d love to see your version.
    Tag me @_angemade and use #CrochetingWithAView so I can cheer you on and share your moment.

    Transparency Note

    This pattern hasn’t been formally tested by others yet. Just me, crocheting across South America with a lot of improvisation and stubbornness. I’ve updated the posts with fixes and tips as I went, and I’m here to help if you run into anything unexpected. Once the pattern is officially tested, I’ll update it accordingly.

    Handmade is always a little experimental, and that’s part of the magic.

  • How I Made This Structured Crochet Flower Bag

    I have been dreaming about this structured crochet flower bag since the winter of 2023-2024, and after a year of moving, pausing, and waiting for the right spark, it finally came together. It mixes crochet flowers with a structured base and a bit of sewing, and it turned into one of those handmade projects that stays in the back of your mind until you finally sit down and bring it to life. If you are looking for inspiration for a spring project or simply enjoy seeing how a long‑awaited idea becomes a finished piece, you are in the right place.

    A Bag a Year in the Making

    After a little winter hibernation I am finally back and ready for spring again. This flower bag has been waiting for its moment for a long time, and honestly so have I. I actually finished it months ago during spring in the south hemisphere, and now here I am in the north, patiently waiting for spring all over again. It feels very on brand for me that this idea started back in the winter of 2023 and only now decided to become a real bag. Apparently 2025 was the year of finishing long forgotten projects, and since I just realized this blog turned one year old, we can call this an accidental anniversary post too.

    How the Idea Finally Clicked

    I wanted a flower bag for a long time. You have probably seen a few of them around, and of course I wanted one too. I even started crocheting flowers back in 2024, but the moment I tried sewing them together I knew it was not going to work. The bag looked soft and floppy and absolutely not the structured beauty I had in mind. So the flowers went into a project bag for a very long nap. I moved countries, went on a whole adventure, came back, and there they were, still waiting for me like nothing happened. They did not even turn themselves into the bag I wanted while I was gone, which was honestly rude.

    Then one day I walked into the craft shop where my mom takes her amigurumi classes, and I saw a display of bags made with plastic canvas mesh and t‑shirt yarn. And that was it. The light bulb moment. The missing ingredient. The second I saw them I knew exactly how to bring my flower bag idea back to life.

    How to Make a Flower Bag Like This (The Short Version)

    Once I finally had the missing piece, I gathered everything I needed for this bag. Here is what went into it:

    • plastic canvas mesh
    • light pink cotton yarn borrowed from my mom’s stash
    • all the crocheted flowers I made back in 2023
    • a pair of D‑rings
    • a detachable chain strap with lobster clasps
    • a tuck lock clasp
    • a tapestry needle
    • a basic sewing kit
    • pastel green satin for the lining
    Can you spot the old attempt? Also I had to DIY my perfect shape of mesh, but you can find the right one easily.

    This is not a step‑by‑step tutorial, but I hope the materials and process give you a good starting point if you want to try something similar. There are plenty of great tutorials out there if you prefer following instructions, but it is also completely possible to have fun and figure things out as you go.

    I started by covering the entire plastic mesh with the pink yarn to create a base for the flowers. One pass did not look great, so I went over it again until the mesh disappeared completely. Once the base was complete, I placed the metal hardware where I wanted it and began sewing the flowers on while the bag was still flat. I saved the ones that would sit on the corners for later, because I still needed to shape the bag and I wanted a few flowers to cover the edges.

    After the majority of the flowers were sewn in place, I moved on to the border and joined the sides together, which finally brought the bag shape to life. You can absolutely sew your lining while the bag is still flat, and part of me regrets not doing that. It would have cut the war short and saved many lives. But I still had flowers to sew over the corners, and I needed the lining to hide those stitches, so the lining had to wait.

    Once the bag actually looked like a bag, I sewed the remaining flowers on the corners. I did run out of the dusty pink yarn, so three light pink flowers ended up side by side, but you might only noticed because I told you.

    With all the flowers in place, the outside was looking great. The inside, however, needed work. I chose a really pretty pastel green satin for the lining, with a bit of stretch that somehow made it both harder and easier to work with. I spent a full day measuring and playing around with the sewing machine, trying to turn that fabric into something that resembled a lining. I am definitely not the person to ask for sewing advice. Believe me, I struggled. But I made it work somehow. When it was finally time to hand sew the lining inside the bag, I could see the light at the end of the tunnel.

    After that, all I had left to do was glue half pearls onto the center of every flower, which felt incredibly fast compared to every other step in this project.

    The Final Result

    And after twenty two days of working on this, the bag was finally done. I have not actually had the chance to use it yet. So far it has only been out for the photo shoot. But for a bag that took more than a year to get out of paper and almost a month to bring to life, I think it can wait a couple more months before it goes out into the wild. I am glad I kept those flowers tucked away for so long, because in the end I finally made something that looks exactly the way I imagined.

    If you have ideas resting somewhere, keep them close. They might not be ready today, but one day the right spark will show up, and they will come back to you exactly when they should.

    And if you are here looking for inspiration, I hope this shows you that projects like this are not as complicated as they look. They take time, yes, but the steps themselves are simple and very doable. You do not need a full tutorial to try something similar, and if you ever have questions or want a bit of guidance, feel free to email me or send me a message. I am always happy to help.

  • Introducing the Cari Top | Reversible Crochet Top Pattern

    I’m excited to share my second summer crochet pattern: the Cari Top! This reversible crochet top pattern brings playful style to easy-making. Two identical panels join in a breezy linen-stitch crochet fabric, while double-chain cord straps add an unexpected twist. I kept the silhouette clean and simple, but of course I got carried away with the loops—creating straps that truly steal the show. Quick to work up, fully reversible, and perfect for warm-weather days, the Cari Top is ready to become your go-to summer staple.

    Note: This pattern actually released months ago, and yes, this post is seriously overdue. I was off traveling and completely absorbed in designing The View Dress. But better late than never, right? I’m thrilled to finally have a dedicated post for the Cari Top.

    Inspired by a leotard I received from a friend, I set out to create a wardrobe staple with something special built right in. The textured linen stitch makes the fabric breathable and soft, perfect for warm days spent outdoors or at the beach. Whether you choose two contrasting hues for a fully reversible look or stick to one color for a sleek monochrome effect, the Cari Top adapts to your style.

    Why You’ll Love the Cari Top

    • Simple two-panel construction makes this pattern relaxing and quick to work up
    • Double chain cord straps add a unique, playful detail
    • Reversible design lets you switch looks in an instant
    • Textured linen stitch creates a soft, breathable fabric for hot weather
    • Inclusive sizing from XS to 5X

    Love crochet but want a modern twist? The Cari Top nails it. The linen stitch looks just like knitting, and the half-double crochet foundation flares the bottom just enough to hug your hips and show off your waist

    Cari Top Materials List

    Yarn

    • Yarn Weight: Super fine / Fingering in Color A and B
    • Color A:

    Yardage per size (based on 50 g skeins = 185.91 yds):
    XS: 706 yds (4 skeins)
    S: 818 yds (5 skeins)
    M: 931 yds (5 skeins)
    L: 1062 yds (6 skeins)
    XL: 1174 yds (7 skeins)
    2X: 1300 yds (7 skeins)
    3X: 1392 yds (8 skeins)
    4X: 1559 yds (9 skeins)
    5X: 1672 yds (9 skeins)

    • Color B: only requires 1 skein for accent details

    Hook

    • Hook sizes: 3 mm for panels; 4 mm for straps

    Notions

    • tapestry needle
    • scissors
    • tape measure

    Gauge

    30 stitches and 30 rows = 4 inches (10 cm) in Linen Stitch, worked with the 3 mm hook.
    Be sure to swatch before you begin. if your fabric comes out tighter, try a slightly larger hook; if it’s too loose, drop down a size. Getting this gauge right means your Cari Top will fit just as you expect, with no last-minute surprises!

    Get Your Copy Now!

    Click below to grab your pattern and start start stitching your CariTop today:

    Grab your Cari Top pattern on your favorite platform and start stitching your new summer essential today.

    When you finish, share your photos with #Caritop. I can’t wait to see which color combinations you choose!

    Thank you for supporting my crochet ideas. Creating the Cari Top was a joy, and I hope you love making it as much as I did.

    How will you style your Cari Top? Tell me in the comments below, I’d love to hear your ideas!

  • Crocheting on Two Wheels (Part 4): The Top Portion

    Last time I wrote from Nasca, Peru. Now I’m back home, and this post is long overdue. (And yes, I didn’t take proper notes and now I’m paying the price.) After we arrived, took some rest, visited family, and explored a few places nearby, I definitely lost a bit of momentum.

    The good news? I did complete my goal of finishing the dress before reaching Brazil, literally the night before. And let’s be honest: weaving in the ends is just the price we pay to be worthy of wearing a handmade piece. The dress is done when you make the last stitch, not when you weave the last end.

    Finishing the Back Panel

    The back panel was completed two days after we crossed the border between Peru and Chile. I tried hard to finish it in Peru, even picked up speed, but no luck.

    Since Nasca, our trip highlights included climbing 4,000 meters in a single day (we felt that), seeing the Andes, and spotting a dog in a helmet on a motorcycle. We visited Cusco with its impressive stone walls at the Sun Temple. We skipped Machu Picchu this time to stay on budget, but we’ll be back one day with better planning.

    We spent two days by Lake Titicaca, saw a geyser on the way out of Peru, and passed by the Atacama Giant in Chile, along with other geoglyphs. I finally tried crocheting on the bike after realizing I’m not a desert person, it’s beautiful for the first few hours, then it gets repetitive. That helped me finish the dress on time.

    We didn’t linger in Chile, maybe four days total, then moved on to Argentina. We didn’t have specific sights to see, just wanted to get home. But we did pass through the Argentinian Chaco, with its long, straight roads, also great for crocheting on the bike.

    Let’s Talk Dress Construction

    For this portion, you’ll need the following measurements:

    • A – Half bust circumference
    • B – Waist to nipple
    • C – Nipple to collarbone
    • D – Neck circumference

    With the back panel done, I returned to the front panel to crochet the top portion. The plan is to crochet upward from the bust.

    To begin, take your bust circumference, divide it in half, and subtract 2–3 cm for negative ease. I was lucky, this measurement matched the width I started my skirt with, so I didn’t need to increase stitches between hip and chest. If you do, increase gradually (like we did before for the skirt) until you reach measurement B.

    In my case:

    • Measurement A = 118 stitches
    • To reach measurement B, I needed 36 rows
    • After that, I began decreasing every other row until I reached measurement C in length, I needed 48 rows. With 24 decreases.

    Building the Straps

    Once the bust decreases were done, don’t cut the yarn. We’ll continue with the first strap.

    Place the top in front of your chest and decide how much fabric you want for the neck portion. What’s left will become the straps. Make sure it’s centered, leave the odd number of stitches in the middle.

    I had 66 stitches after the bust decreases. My straps were 8 stitches wide, which left 50 stitches for the neck portion. I added a 1-stitch gap between the straps and neck, so the neck ended up with 48 stitches connected to the dress.

    To make the straps:

    1. Crochet half double crochets until the strap is long enough
    2. Connect it to the dress where the decreases begin
    3. I sewed mine by single crocheting the last row of the strap with the side of the top
    4. Make them tighter than you think, they’ll stretch over time

    Repeat the same number of rows for the second strap, this time attaching the yarn on the other side. I recommend trying it on before cutting the yarn on both straps, so you can adjust if needed.

    Finishing the Neckline

    To finish the neckline, calculate how many stitches you need for measurement D (neck circumference). You already have some stitches on the dress, add the rest on both sides.

    In my case:

    • Needed: 76 stitches
    • Had: 48 stitches
    • Added: 14 stitches on each side

    To do this:

    1. Chain 14, connect with half double crochets across the top
    2. Chain another 16, turn, and place half double crochets from the third chain to the end
    3. Continue adding rows until you reach about 3 cm (two fingers’ worth)

    For closure, I used hooks and eyes, sewed them on the corners and it worked well.

    I should add a third hook and eye in the middle, but oh well…

    Final Touches

    Once the panels are complete, sew them together carefully, keeping the edges aligned. The back of the skirt will forms a cowl neck effect. To keep those folds in place, I recommend sewing them down gently, this part may take a bit of experimentation, so play around until you’re happy with the result.

    photo sewed folds

    Please forgive the cats hair

    As a final optional detail, I added a thin cord at the back to accentuate the waist:

    1. I placed 3 half double crochets on the side of the piece, where the back panel ends and the top portion begins (photo)
    2. Crocheted a cord long enough to reach the opposite side
    3. Sewed a hook on one end of the cord and an eye on the other side of the dress
    Yes, this is after I fixed it.

    Final Thoughts

    I definitely regret not writing this sooner, it would’ve been easier with the details fresh in my mind. But the dress is done now. As usual, it didn’t turn out perfect, but it’s good enough that I’ll just need to fix a few things.

    Don’t worry, I’ll document those fixes in another post and go back to update the earlier ones with tips to avoid the same issues.

    Right now, I’m working on a top using the same approach. Just using a bunch of colourful leftover yarn. It will be fun to see how the same idea can be done slightly differently. If it behaves, you might see it in the future.

    If you’re making this dress, I’d love to see where your stitches take you. Whether it’s a quiet morning on the porch, a bustling café, or a view that makes your heart feel full—share your crochet moment. Tag me and use #CrochetingWithAView so we can celebrate the beauty of handmade, wherever you are.

  • Crocheting on Two Wheels (part 5) Mistakes I made and how to fix them

    I finally finished the dress, but if I said it was perfect on the first try I’d be lying. Even though this is my third attempt, and it’s the first version that actually covers everything it needs to. In this post I’m sharing the two small fixes I made, why they were needed, and how I corrected them.

    Back Cowl Neckline Too Low

    When I designed the cowl neckline at the back I left too much extra fabric. As a result the cowl hung lower than intended and made the back panel longer than the front. Part of the issue came from using my hipbone measurement instead of the waist measurement (see Part 2 of the series) to start the skirt. Simply adding some positive ease should be enough. Losing a bit of weight on the trip only made the problem worse.

    How I fixed it

    1. I measured how much fabric to remove from each side of the skirt panels.
    2. I resewed the panels together, tucking the excess fabric inside.
    3. when back and resewed the folds, with only one instead of two folds.

    The side of the dress had a loose fit

    The dress flared too much at the sides partly because it’s backless and partly because I made that section a bit too long. To bring the sides in I used elastic thread.

    How I fixed it

    1. I slipstitched with a black elastic thread along each side edge.
    2. The elastic holds the edges together while remaining flexible when I move.

    Final Fit and Feel

    After these tweaks I’m very happy with the finished dress. It fits my hips exactly as I imagined. The bamboo yarn feels light, soft, and drapey. It was tricky to work with at the start, but once I got used to the splitting the project flowed beautifully.

    Blocking

    I skipped blocking on this piece (do what I say not what I do), though bamboo yarn will stretch slightly. In my other projects I haven’t noticed major changes, but I’ll be careful when washing and blocking this one. I plan to reshape it as it dries so it holds the silhouette I want.

    Updates and What’s Next

    By the time this post goes live I will have updated the earlier posts so you can avoid these same mistakes. If you still run into trouble, that’s part of the handmade journey. We’ll fix it together instead of frogging the whole thing. This dress has too much baggage to be frogged.

    If you run into any trouble making your own version of this dress, don’t hesitate to reach out, I’m here to help. This pattern asks you to figure out a few steps on your own, but it’s much simpler than it first appears. Happy stitching!

    If you decide to make this dress, I’d love to see your version, especially if you’re crocheting with a view. Whether it’s a mountaintop, a city balcony, your favorite café, or just someone you love nearby, share your moment. Bonus points if it’s outside. Tag me and use #CrochetingWithAView so I can cheer you on and share the inspiration.

    Want to stay in the loop and never miss an update? Subscribe to my newsletter or follow me on Instagram @_angemade. Let’s keep crafting together!

  • Crocheting on Two Wheels (Part 3) Skirt’s Back Panel

    Where have I been?

    Last time I wrote, I was in Quito. I had just seen the Mitad del Mundo, where the Ecuador line is. Today, 22 days and 1,671km later, I’m writing from Nazca in Peru. On my Instagram I’m still in Trujillo, that’s our secret. I leave my posts scheduled to make sure I can post one everyday.

    Since then I’ve seen foggy forests, beaches, deserts, canyons, a beautiful lake between giant rocks, an oasis, the Andes. Went from sea level to over 4,000 meters high. I hit some really bad roads but enjoyed great views everywhere.

    Head to my Instagram to see all the places I’ve crocheted along this trip. Stick around until the end to see the final result.

    I finished the front panel by the Sausacocha Lake, about 1,200km ago. I started the back panel the next day, in Trujillo behind a Moche temple. I should have written this back then, but here we are.

    Let’s dive into the back panel

    As I mentioned last time, on Crocheting on two wheels (Part 2), the back panel is just a little more complicated than the front.

    For the front panel, I made 18 increases over 9 rows, evenly spaced across 45 total rows.

    For the back panel, we repeat that process with extra increases to account for the difference between our Cf and Cb measurements.

    You might ask: Where? Along two lines, like the darts in pencil skirts.

    To do this, calculate how many stitches it takes to go from measurement Cf to Cb. In my case, a 10 cm difference equalled 28 stitches with my gauge. 

    We have two darts, so each increase row adds 2 stitches. Therefore, I need 14 increase rows (28 divided by 2).

    I’m placing those increases every other row because I want it to grow faster, than the sides. That gets me to 28 rows, the side increases (which are the same as the front panel) are done over 45 rows.

    Quick tip to track  your rows

    To track my rows (regular ones, dart-only increases and combined increases), I noted every 45 increases rows on my phone. 

    This way I don’t lose track of what I should do next, especially when it’s very hard to see this black yarn.

    Now, where to place those “darts”?

    It’s simple: we started the panel just like the first, with regular rows (no increases) from point A to B. Same number of rows and stitches. I then began dart increases after two rows of the increase section. As you can see in the previous picture.

    Future Angela will make an appearance here too. Just a reminder that the previous paragraph was a mistake, so go back to Part 2 if you need. But you should have done the first panel already, just repeat the correct way of doing it here too.

    Then divide the number of stitches you ended up by three, if it’s uneven, put the larger section in the middle. In my case I had 118 stitches, divided by 3 it’s 39.3333. So that allows me to divide my stitches as 39 | 40 | 39. I’ll be placing my stitch markers on the 39th stitch from each edge. After each dart increase, shift the marker inward: the first increase adds a stitch before the marker, the second adds one after.

    With that all figured out, crochet until you have the same amount of rows as the front panel. 

    Six-Week progress check

    I feel like my speed got a bit better, I’m used to the routine now, after six weeks on the road, it was about time! During this time I’ve launched a pattern, boosted my Instagram activity, and i have had a sale going.

    I hope to keep up this momentum, the second panel should not take as long as the first one, even with more crocheting to do. Soon enough I’ll have part 4 for you, where we can join the panel, add a little something and maybe talk about the top portion.

    Also if you have any questions (crochet or travel) leave them in the comments. And if you’re planning to make this dress, show me your progress with a view! It could be a mountain, a window, your favorite person, or just a cozy corner outside. Wherever you crochet, I’d love to see it, tag me and use #CrochetingWithAView so I can cheer you on and share your vibe.

  • Crocheting on Two Wheels (Part 2) Skirt’s Front Panel

    My trip started in Bogotá. I would love to say I started crocheting right away, but that would be a lie. I was still getting used to the routine, and I kept forgetting to keep my crochet in hand.

    Our first stop would be Cartagena, 981km north from Bogotá. It took us 5 days to get there. All I could do with my crochet was to finish my swatch and make the calculations for the skirt in a nice hostel in Santa Cruz de Mompox.

    The Plan

    My plan is to make the skirt first, since I always struggled to find skirts that fit me properly on my waist and my hips at the same time.

    Thats why the front panel will be slightly different than the back panel, because our bodies are not perfectly round and our butts need more space than our fronts.

    Within this post I’ll only explain the front panel, that’s where I’m starting. With the easier one first.

    The measurements we need are:

    • A- Half of the Waist +3cm (of positive ease)
    • B- Half of Higher hip (across the hip bones)
    • C- Full Hip (widest point, including the butt)
    • Cf- Front half of measurement C
    • Cb- Back half of measurement C
    • AB- distance between measurement A to B
    • BC- distance between measurement B to C

    You can use the seams on your pants as a quick guide for measurements Cf and Cb, those two should add up to measurement C.

    Measurements A and B are the circumference divided in half equally. But for measurement Cf and Cb the division is not the same, I measured again only the front half, and the back half.

    My measurement C was 106cm, my front panel was 48cm and my back panel was 58cm.

    Transforming cm into Stitches

    With our measurements in hand we just need to know how many stitches are the equivalent for that, and to do that we need a gauge swatch. Yes that’s what they are for too. (btw I use cm cause that’s what my brain is used to. You can use inches, no need to convert.)

    After you have crocheted a slightly bigger than a 10X10cm square. Count how many rows you have to get 10cm, and how many stitches to get 10cm.

    For example, mine was 28st and 24 rows equals 10cm. Or to simplify the math 2.8st and 2.4 rows equals 1cm. Still count the stitches over 10cm and then divide, it will give you a more accurate number than counting the stitches over only 1cm.

    I decided to start with measurement B, not A. I’m still gonna see if that was a mistake, there’s an effect I have in mind. We are trusting the process for now.

    Future Angela came back here to say: It didn’t work, at least not completely. As you can see on Part 5 of this adventure. with that said, please ignore the previous paragraph. Start the skirt panel with measurement A (your waist measurement divided by 2 plus 3cm of positive ease)(the positive ease will determine how low the back cowl neck line will go, if you want it higher leave a smaller positive ease). But instead of making rows with the same number of stitches to get from A to B, we will increase the same way we did to get from B to C as I will explain next. You might have a different ratio of increases from AB compared to BC

    Getting to the math

    So we need to go from measurement B. To measurement Cf.

    For that, just transform measurement B and Cf into a number of stitches. And measurement AB and BC into a number of rows.

    I need to start with 118st, that equals my 42cm (42×2.8=117.6). First we need to get from A to B, for me 19 rows was needed or that (8×2.4=19.2)

    After that, we need to get to 136st, equivalent to my Cf measurment. In 48 rows, which is the distance between my point B to point C.

    That being said, my 136 minus the 118 from the start, equals, 18 stitches that I need to increase. And doing an increase row with increases on both sides, means, I need 9 increases rows. Over 48 rows, 48 divided by 9, equals 5,3333… So we can round it down to one increase row every five rows.

    Rounding the number of rows down means the width will grow faster, which is good in that case.

    For the number of increases, it does need to be a pair, so round it up if you need.

    For me this all results in:

    1. 19 regular rows with 118st. (that will get me from measurement A to B in length)
    2. Then 45 rows between measurement B to C with increases in every 5th row.

    After that keep going until I’m happy with the length.

    Future Angela here again. What I should have done was: start with 110 stitches, and make 8 increases over the 19 rows. Being 4 rows of increase over 19 rows, I would end up making 3 regular rows, an increase, and an increase row every 5 rows until you get 19 rows.

    Now back to past Angela.

    And since that will take me a while, especially with the amount of crocheting I’m actually being able to do. I’ll be back here on another post to ramble about the back panel.

    I hope this makes sense, math sometimes can be scary, but we are just transforming one number into another one. If you feel like making this dress and need help with your numbers feel free to reach out.

    If you’re making this dress, I’d love to see where your stitches take you. Whether it’s a quiet morning on the porch, a bustling café, or a view that makes your heart feel full, share your crochet moment. Tag me and use #CrochetingWithAView so we can celebrate the beauty of handmade, wherever you are.

  • Crocheting on Two Wheels (Part 1) The Start of The View Dress

    I write this from a plane over the Amazon forest right now, that feels pretty good, to be honest. Today I start my bike trip around South America. Isn’t this a crochet blog thing you say? It is, that’s why the focus of this post will be to talk about the project I’m taking with me, because any crocheter knows, a long trip needs a project.

    I’ll might have a lot downtime during this two or three months I’m going to go from Bogota, Colombia, to my hometown in the south of Brazil. We have no set itinerary. So to keep me busy and maybe you entertained I want to write about it during this time. But not that much about the trip it self (But who knows, sometimes the trip part will take over.) But mostly about the project that I’m taking with me.

    A crochet dress.

    I have it in my mind for three years now I believe. I have started it twice already. I’ve been calling it The Insanity Dress, but I will find a better name for it along the way. But I am definitely a bit crazy for this one.

    First, because it’s the first dress I’ll try to crochet. I have knitted one this year, but that’s not the same as we all know. 

    Second, I decided that I wanted to make it in black bamboo yarn, super thin. And using only half double crochets. 

    Yes I know, crazy. 

    Black? Famous for being hard to see. Especially in poor lighting. 

    I’m using a 2.5 mm hook, and my favorite stitch. But with the very fine yarn this thing will take forever. 

    Lastly, bamboo yarn. I imagine anyone who’s worked with it has a love-hate relationship. The feel of the fabric and drape is great. But it’s slippery and splits all the time. 

    Even with all the cons laid out, I tell you, the look I have in mind… Worth it. 

    I wish I was good at drawing to properly translate the image I have in mind. I guess you will have to stick around for a bit and see if I finally finish this dress. 

    My plan is to write about it once a week, maybe every other week. Telling what I have done and how, maybe by the end you can make yours too. (no bike trip required) 

    For now all my yarn is packed up. I’m still working on the swatch so I can redo all the math from before. The first two times I started with the skirt, it didn’t turned out the way I wanted. 

    I tried it the first time crocheting in the round. Not a fan of how the “scar” from finishing a row and starting the next looks. 

    The second time, I worked in two panels. The increases for the hips worked, but not a 100%. After two years, I figured it was better to just start over. Also, pretty sure my measurements changed. 

    I hope to share photos or videos of me crocheting around in different places for the next few weeks. For that you might need to check my instagram, I’ll try my best to have a daily update of this dress and trip. I hope you stick around to see the final result! 

    I’m not quitting this dress a third time. I am finishing it!

    Meet Blue. She will be taking us on this journey.

    Here is a summary of the next parts

    Crocheting on two wheels (Part 2) – Where I talk about the skirt’s front panel

    Crocheting on two wheels (Part 3) – Here you find the back panel

    Crocheting on Two Wheels (Part 4) – All about the top portion

    Crocheting on Two Wheels (part 5) – The mistakes I made and how to fix them

  • Introducing the Maré Top | Summer Crochet Pattern

    I’m more than excited to finally share my new pattern with you. The Maré Top, a fully customizable, made-to-measure crochet pattern designed for intermediate makers (or confident beginners ready for a fun challenge). It’s flexible enough to work with any yarn in your stash, and the adjustable fit means it’s made just for you

    This project holds a very special place in my heart, it was my very first design, back in 2023. And Since then, I’ve been saying I would write it down.

    It’s only 2 years later. But I finally did it. Better late than never.

    And after a few months of testing, making sure everything is set, (and getting sidetracked by other projects)…. It’s officially out!

    If you’re looking for a fun, satisfying project to add to your summer wardrobe. The Maré Top can be your next favorite. You can grab the pattern on Ravelry or Ribblr.

    How it started…

    I’ve always loved crochet. But not the overly crocheted look. You probably know exactly what look I’m talking about (not that there’s something wrong with it, I just don’t like it for my clothes).

    For this top I wanted something different. Something I could wear it casually or dress up. That at first glance looked simple, but had a WOW effect when you turn around.

    I started with the three colors I was gonna use. I wanted striped crochet top with a wave-like effect. A basic shape with straps that didn’t require chains. Before I knew it, the top was taking shape

    I wish I had a super cool story of inspiration behind it. But i don’t. This is just me making a crochet tank top with my preferences in mind. No big crochet “holes” in it. Cropped, cause everything I own is high-waisted. Open back. No long cords and complicated tying methods. Three straps because I had three colors, simple as that.

    Why You’ll Love the Maré Top

    • Made-to-measure for the perfect custom fit
    • Works with any yarn from your stash
    • Bold, modern open-back design
    • Two closure options: button or tie
    • Learn a new skill: Chainless Foundation stitch

    If you also love crochet but prefer a modern look, the Maré Top is perfect for you. It’s open-back design makes it perfect for a hot summer day. It’s easy to wear and versatile for different outfits.

    Made for Crocheters of All Sizes

    The Maré Top is an intermediate-level pattern that adventurous beginners can absolutely try. It’s made-to-measure, works with any yarn and compatible hook, and adapts to your preferences.

    Want a tighter fabric? Go down a hook size, no problem. Prefer a cleaner finish? Go with the button closure. Want sizing flexibility? Choose the tie-back version.

    If you can make double crochet, half-double crochet, and treble crochet stitches… The only major different technique needed is the Chainless Foundation, but by the end of this pattern you will have mastered that skill.

    Get Your Copy Now!

    Click below to grab your pattern and start start stitching your Maré Top today:

    You can find this pattern on Ravelry and Ribblr, so choose your favorite platform and get started.

    Crochet is all about making something uniquely yours.

    So get creative, experiment with colors, adjust the fit, and truly make the Maré Top your own. And when you finish, don’t forget to share your creation. I’d love to see it!

    Maré Top Gallery: See Other Makers Version

  • Spa Day Wristband Free Crochet Pattern

    Do you also feel personally victimized by water dripping down your arm while washing your face? That puts me off of washing my face sometimes. Especially now that I’m the one cleaning up the mess on the bathroom counter.

    You probably have seen plenty of solutions for dealing with this problem. Yes not exactly the world’s most pressing issue, but why not solve the small stuff to make life better. You can use hair scrunchies. Buy a microfiber wristband, pretty sure there’s even a silicone one now. They get the job done. But why settle for store-bought one, when you, a skilled crafter, can make your own?

    If you crochet your face wash wristbands, you can customize them as you wish. Using yarn you already have. It’s a stash-busting win, and a step away from adding more plastic to the world.

    It’s worth mentioning that this is the perfect pairing for my Spa Day Headband crochet pattern. If you made that one, you can use the leftover materials for this little project.

    But Lets move on to the Tutorial!

    Material List

    • Hair tie or Elastic band that fits around your wrists
    • Leftover yarn (I’m using a worsted weight on mine)
    • Crochet Hook compatible with the yarn
    • Tapestry needle for weaving in ends

    Let’s start crocheting

    1. Make a slip knot
    2. Slip stitch around the hair tie or elastic band
    3. Chain 3
    4. Place 3 Extended Double Crochets around the hair tie or elastic band
    5. Chain 2
    6. Repeat step 4 and 5 until the hair tie is no longer visible. The fuller the better
    7. Slip stitch in the first stitch of the round.
    8. Fasten off and weave in the ends

    Make a second one if you have two arms. And you’re ready to keep your arms dry while washing your face.

    And if you’d rather use this as a hair accessory, go ahead and call it a scrunchie. You made it, you call it whatever you want.

    To make the Extended Double Crochet: you start the double crochet as usual with a yarn over and pulling through the first loop, but before you keep going as usual, you yarn over and pull through one loop, and then yarn over and finish your double crochet normally. If you are a visual learner you can watch Tamara Kelly’s videos on it here.

    This is the main way I found online on how to make a Extended Double Crochet. That is not how I do it. I learned this way from Marie Castro. We do the extra chain not at the start but before the end. Breaking it down is: yarn over as a regular Double Crochet, pull through the loop, yarn over, pull through two loops as normal, yarn over, pull only one loop, yarn over pull through the last two loops as normal.

    They will look slightly different. Try both and choose what resonates with you the most.

    Instead of the Extended Double Crochet, you can make a Treble Crochet if you prefer (especially if you are using a thinner yarn and wants a longer stitch). If you want to make the first round all single crochets and than make the second round like this, do it. We crochet to make things our way.

    You can check a quick video of this tutorial on my Instagram.

    I hope you enjoyed the small crochet project. Face wash Wristbands are such a practical and easy addition to our self-care routine, and it’s extra special when we make them ourselves.

    If you’ve already made the Spa Day Headband, these wristbands are the perfect match to complete your DIY spa set. If you’re not sure what I’m talking about, the Spa Day Headband is another crochet pattern I’ve designed to help keep your hair in place while washing your face. You can read more about it here.

    Treat yourself or gift them as a thoughtful set to a skincare enthusiast, they will love it. Please don’t forget to tag me on Instagram if you make yours! I will love to see your creations and hear which Extended Double crochet method you chose.

    And if you have any questions let me know. Leave a comment, DM me on Instagram, or even email me. I will be more than happy to help.

Behind AngeMade

Hey there! I’m Angela, the creator behind Ange Made.

Check the About Me page to learn a bit more about me!

Let’s Create Together

I invite you to explore my blog, discover new patterns, and learn more about slow fashion and crochet. Together, we can make a positive impact on the world through mindful and creative crafting!